Cleaning, conserving, repairing and remounting a Giant Irish Deer skull, antlers and mandible (and modelling-in missing antler tines) for the National Museums of Northern Ireland, Belfast
This specimen is very dark (figs 1 & 2), having been treated historically with some kind of consolidant or lacquer.
This is best seen on the mandible (see description below & fig 3). The specimen was dirty, with very dark dust and
fluff, plus splatters of paint. Three tines had been damaged in the past, one only missing its tip, but the other two requiring considerable
modelling-in (figs 4-7).
1 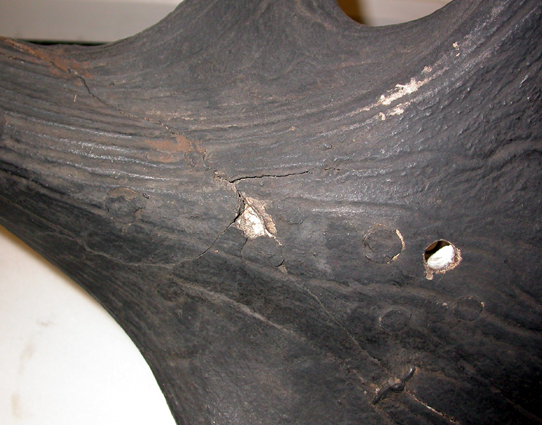 2
2  3
3 
Figures 1 & 2 show the damage to the palm of the antlers and the damage to the skull. Figure 3 shows the pair of mandibles, with one side cleaned (left) and one side before cleaning (right).
First, the specimen was cleaned with a vacuum cleaner and soft brush then by gentle swabbing with Synperonic-N in water, wiped dry immediately. Drops of paint were all over the specimen, plus the some residues of glue presumably from old labels. These all had to be removed with a scalpel.
There were large and extensive old gaps in the palm of the right antler that required consolidating and filling (fig 1), and across the top of the skull as well (fig 2). These repairs could only be dealt with once the specimen was in place on the wall as there was bound to be movement between the parts whilst the specimen was being handled in to position. Old gap fills that were deteriorating were removed (a mixture of plaster, masking tape and possibly wax).
One half of the mandible was cleaned but as the mandible was not going to be hung with the rest of the specimen, the other half was not cleaned. However, this does provide a good illustration of what sort of condition the specimen was in: the two look very different (fig 3). The half not cleaned is almost black, and very little detail can be observed. It looks like in the past it has been given one or more coatings of very dark shellac or a similar ‘protective’ varnish. The cleaned half is still quite dark – a sort of dark mahogany red – but it is now much cleaner and detail can be seen. As they will not stay with the rest of the skull, it is important that both halves of the mandible are labelled with the specimen number as soon as possible.
The two rearmost tines – one on left and one on the right – were modelled-in by inserting thin wooden rods into the hollow broken ends of the tines and securing them with plaster, to which fine aluminium mesh was attached with plaster in the approximate shape desired, making sure the new tine tips would not reach back inappropriately far, i.e. so that they would not need to poke through into the wall once the skull was secured against the wall. The shape of each tine was modelled-in by adding more plaster (containing brown and black pigment in case of future damage) until the desired shape was achieved (figs 4-7).
4 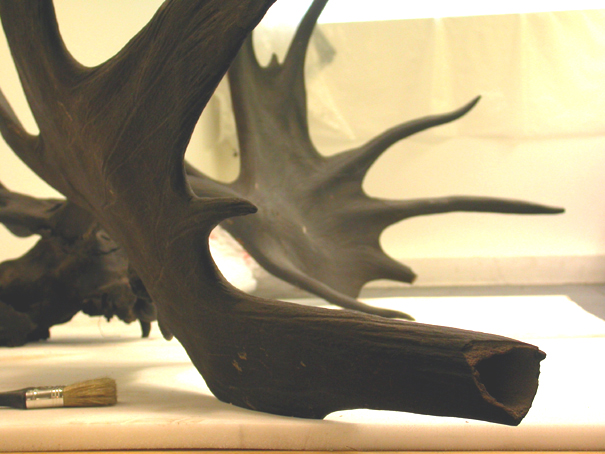 5
5 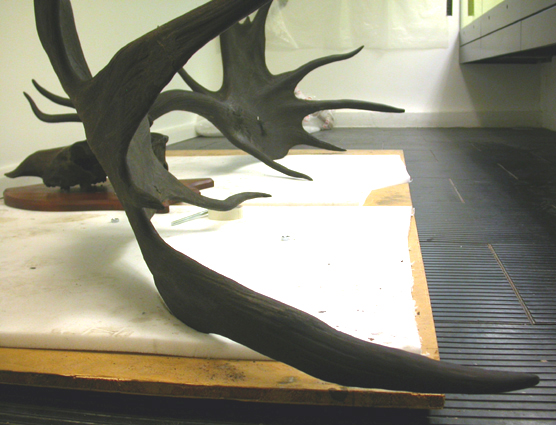
The images above show before and after modelling-in the missing antler tine.
6  7
7 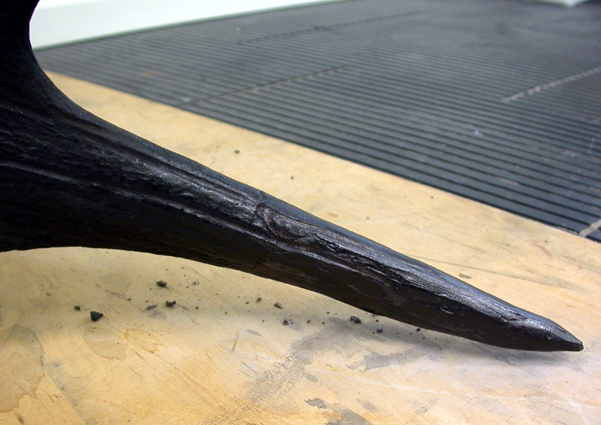
The images above show before and after modelling-in another missing antler tine.
Holes existed in the palms of the antlers already for mounting using cables, but not in the skull. The mahogany shield provided for the skull was not suitable as the wall was not solid – there was a gap between the plasterboard and the concrete wall behind. Instead, two lengths of threaded bar were secured into holes drilled into the plasterboard/concrete wall in the correct positions so that they would protrude through the temporal fossae of the skull when it was offered up to the wall. Nuts were secured to the ends of these bars once the skull was in place, and 1.5 mm diameter steel cable and U-bolts were used to suspend each of the antlers from appropriate bolts inserted into the ceiling.
After mounting, the remaining cracks and gaps in the skull and antlers were filled with plaster of paris containing black and brown pigments, and were then painted-out with artists acrylic paints to match the surrounding specimen. Finally, they were given a coat of Paraloid B72 to match the lustre of the surrounding bone and antler. The steel cables, washers, nuts, threaded bar and U-bolts were all painted appropriately with acrylics: a very dark brown when against the bone or antler, or white when seen against the wall.

The finished specimen secured to the wall
For more details about what we can do for you, or for a quote, please
contact:
enquiries@natural-history-conservation.com
We
are members of the United Kingdom Institute for Conservation of Historic and
Artistic Works