The cleaning, conservation and remounting of a rare Quagga skeleton (Equus quagga quagga) for the UCL Grant Museum of Zoology Nigel Larkin, April 2015
History of the specimen
University College London’s Grant Museum of Zoology has one of only seven quagga skeletons known to exist in the world. It is displayed in their ‘Extinct and Endangered’ section near the museum entrance. Quaggas were a type of South African zebra with fewer stripes than other species, the stripes being only on the front with the hindquarters being brown. They were wiped out in the 1880s through hunting by westerners for their unusual pelt and because they competed with farmers' livestock for grazing. The last individual died in Amsterdam Zoo on 12th August 1883. It was long thought that this particular skeleton that had been at the museum in London since 1911 was that of a normal zebra, one of two housed at the museum. In 1972, rumours that one of these zebras was a quagga resulted in an examination of the specimens. It turned out that the museum did indeed have a quagga, but the other “zebra” skeleton turned out to be that of a donkey. The other six quagga skeletons are scattered across the world, in Holland, Germany, France and the USA. None remain in South Africa. For a full list of all specimens see: http://www.quaggaproject.org/quagga-museum.htm
This specimen was cleaned and conserved as part of University College London Grant Museum of Zoology’s
Bone Idols Project (funded by NatSCA, Arts Council
England's Museum Development Fund and various members of the public).
Condition of the skeleton
This skeleton was in a relatively good condition. It was not that dirty as it had been on display in a wood and glass display case.
However: there was some dirt on the top surfaces of bones; there were splatters of grey or silver paint (particularly on the rear of
the skull and atlas vertebra but also on ribs etc); some areas of excess glue around old breaks; an old gap filler in the fourth right
rib had cracked badly and was unsightly; and the sternum was very greasy, sticky and black. The cervical vertebrae were upside down and
needed to be re-orientated, and a transverse process of one vertebra was hanging down (an old break, wired) and needed to be re-orientated
and held properly in place. The spine was too straight, it required a gentle ‘dip’ just anterior to the pelvic region.
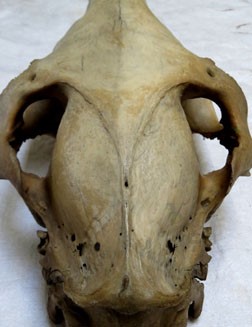
One of the upper incisors was missing but this is likely to have been lost in life as the gap left is quite small.


Above left: the skeleton on display before conservation. Above right: the gap in the row of upper incisors.
Condition of the metal supports and wooden plinth
The old wooden plinth was a mess with peeling paint, knocks, dents and scratches and two large holes that had been inexpertly filled when the upright supports had been moved in the past. Therefore a new plinth was needed.
The rear upright pole was not in the correct position. It needed to be moved further towards the front by about 10cm so that the thin metal rod pointing downwards from the front of the sacrum inserts into the top of the rear vertical pole (which is a tube). This would raise the rear of the specimen by about 5cm, meaning that it would be easier to re-articulate the head of the right femur with the acetabulum. However, the femur would still be positioned too far away from the body so the metalwork needed to be adjusted to bring it closer so that it articulates correctly.
The front vertical support was very wobbly and loose. The top was leaning forwards when it should be vertical. This was partly because of the weight of the skull etc pulling it forwards. This vertical pole needed to be moved back to its original upright position. There was scope for increasing the length of the plinth at the front by 17cm and inserting a third upright rod that, if suitably angled, could give additional support to the skull, reducing the forwards-pull on the front of the specimen and reducing the stress on the skull and negating the need for unsightly wire at the rear of the skull. However, this might have looked unsightly and interfere with other specimens in the display case so alternatives to this solution were explored including a brace from the rear display case wall to the skull.
Cleaning the skeleton
All the bones were gently brushed with small soft brushes next to the hose of a vacuum cleaner to remove the dust and fluff. Then all the bones were cleaned with a gentle conservation detergent, an alcohol ethoxylate (Synperonic A7) in distilled water. It was applied to small areas at a time with a soft brush or with cotton swabs, then wiped away immediately with a lint-free paper towel. Then the area was cleaned again with clean water on swabs or soft brushes (with no detergent) and immediately dried again with a paper towel. The blobs of grey paint and areas of excess glue around old breaks were removed very gently with a scalpel when the area was briefly dampened by this cleaning.
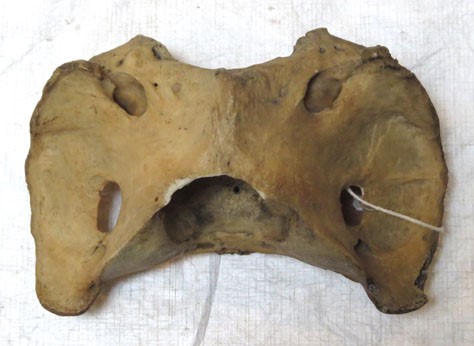
Examples of how effectively the bones were cleaned. Above left, the atlas vertebra with the left side cleaned, the right side still dirty. Above right, the rear of the skull with the right side cleaned and the left side dirty.
Below left, the rear of the skull before cleaning and removing the blobs of grey paint. Below right, after cleaning.


Above: an old break that had been glued had been left with excess glue on the bone around it (left). This was removed (right).


The fourth right rib had an old gap filler near the rib head that was cracking and falling out (above left). This was consolidated and a new gap filler applied to the cracks (above right). The filler was made from Paraloid B72 adhesive and inert glass beads (Larkin and Makridou, 1999).
The sternum was very greasy, extremely sticky and black. This was successfully cleaned by gently scrubbing the sticky areas with a slightly stiffer artists brush dipped in the same Synperonic A7 and distilled water solution, but with acetone added. It was then cleaned again with just synperonic and water, and again with just water, all the time keeping the area as dry as possible by dabbing with paper towels. This area took a huge amount of work to remove most of the stickiness and black residue.


Above left: the right side of the sternum before cleaning. Above right: the same side of the sternum after cleaning
Rearticulating the metalwork and bones
The rear of the skeleton was held in place simply with a long metal pin inserted through a hole in the vertebral rod, through a hole in the sacrum and into the top of the rear vertical support. This vertical support was a steel tube that had a thread on the lower end so that large nuts could be tightened above and below the wooden plinth (with washers between), holding the tube fairly steady. However, not only was the metal pin no longer inserting into the tube as the tube was in the wrong position and was simply placed under the sacral block further back (without even any Plastazote foam between the bone and the metal tube or the wire that had been used in an ad-hoc fashion) but the old metal pin had rusted securely to the horizontal metal vertebral rod (below left) and was extremely difficult to remove. In the end it had to be drilled out. It has been replaced with a stainless steel pin so that this will not happen again (below right). The vertebral rod was removed and cleaned so that it is less rusty. The upright tube has been moved back into the correct position, the new steel pin inserts into it correctly and there is a piece of black Plastazote foam between the top of the tube and the bone.

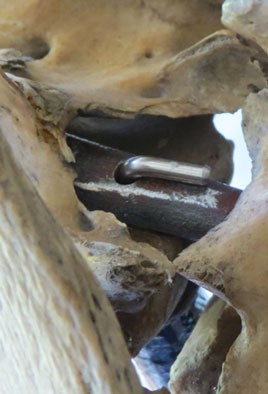

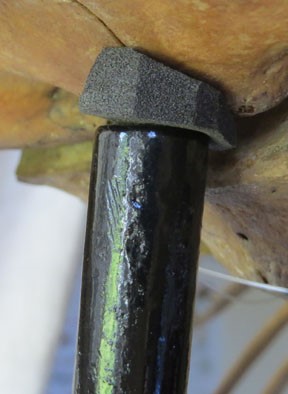
Above left: the pin that should sit within the tube is to the right of the image, about 10 or 12cm anterior to the top of the tube when it was on display before. The pole has since been positioned further forwards and the securing pin sits comfortably within it, with Plastazote foam between the top of the tube and the bone (above right)
In a similar way, the pin holding the vertebral rod and vertebrae secure at the front (see images below) was quite rusty and very difficult to remove. The pin, the washer and the rod have all been cleaned free of rust and have been put back together.


Above Left: The nail holding the anterior end of the vertebral rod in place, running through the centrum of a thoracic vertebra. Middle: the rusty nail and washer. Right: the same after cleaning.


Above left: the top of the supporting upright metalwork at the front of the skeleton, rusty. Above middle: the same metalwork after cleaning and repainting. Above right, the bracket for the skull
The fork of the front upright, in which the front thoracic vertebrae sit, was rusty. This was cleaned and painted to match the rest of the paintwork (see above). The upright had been leaning forwards due to the weight of the pole itself and the weight of the cervical vertebrae and the skull, all pulling it forwards. This will be remedied by using a bracket that has been made for the purpose (see below). This will screw to the rear wall of the cabinet and will hold the skull in place simply by holding it underneath the palate. This will not only hold the skull in a better position anatomically (not so vertical), but it will remove the pressure within the thin, fragile braincase of the skull where the weight was taken before. It will also stop the whole front of the skeleton pulling forwards, keeping the upright support in a vertical position.
The cervical vertebrae are stuck on the front pole. They can be moved, but not removed off the pole without straightening-out the front portion of the pole so there is not such a bend. It would have to be heated to do this without risking cracking the metal – but it cannot really be heated whilst the vertebrae are still threaded on to it. Luckily they did not have to be removed to turn them the right way up.
The vertebral rod was dead straight before, giving the specimen a flat straight back when –
judging by all the photographic evidence for quaggas and zebras – there should be a ‘dip’ in the spine just anterior to the pelvic region. Some of this ‘dip’ is likely to be exaggerated by the muscles of the rump of the animals, but certainly the spine required more of a curve to it. Therefore the vertebral rod was removed, heated, bent to the required shape, thoroughly cleaned of rust and was reinserted (see images below).

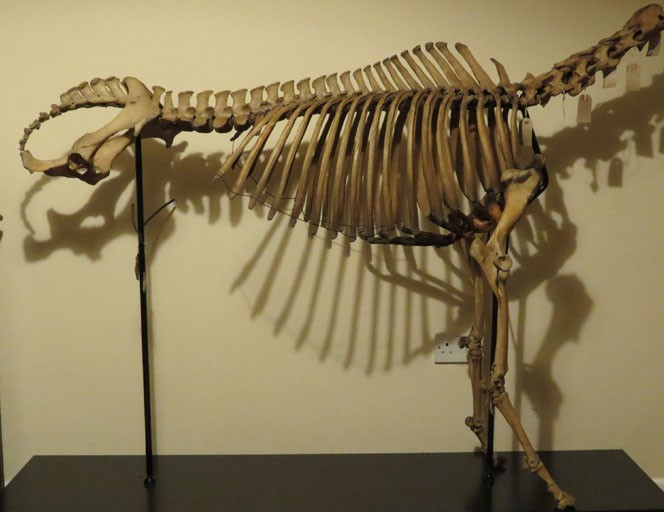
Above left: the specimen on display before conservation. Above right, the specimen after some adjustment to
the horizontal vertebral pole to give it a curve and with the rear vertical support in its correect position.
Making a new plinth
The old plinth was a mess. It had peeling paint around the sides plus knocks, dents and scratches all over its surface and two large holes that had been inexpertly filled in the top surface. Therefore a new plinth was made to exactly the same dimensions, in MDF. This was covered in Dacrylate, to reduce emissions from the MDF, and was then painted with a satin effect black paint (some of the black plinths in the museum are too shiny, but matt black can look scruffy so ‘satin’ finish was chosen). Holes were drilled in the midline just big enough to take each of the two threaded upright metal rods that support the skeleton. As these rods project down underneath the base so that large nuts can be threaded on to keep the poles secure, the base needed to be hollow. So 30mm thick MDF was used with a second layer glued and screwed together underneath around the sides, with a hollow interior. This means it is effectively 60mm thick, the same as the old base.
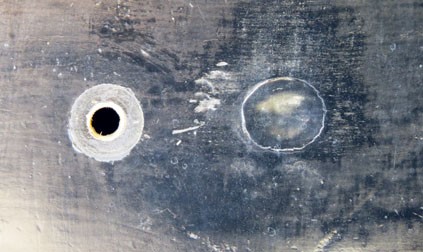
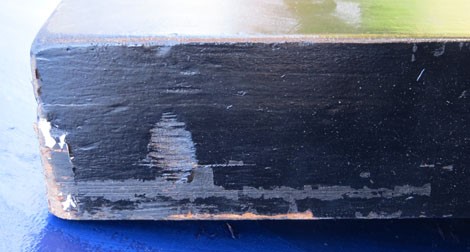
Above left: the rear hole in the plinth for the upright metalwork, and beside it a poorly-plugged old hole. This had also been done badly at the front of the plinth as well. Above right: the state of the woodwork and paint of the plinth. Below: the new plinth.

The rear limbs
The metalwork for the rear right limb was gently bent back into position so that the femur now articulates with the acetabulum.
The rear left limb has been missing for decades.
As a fourth limb would provide the specimen with greater stability and would improve the look of it aesthetically,
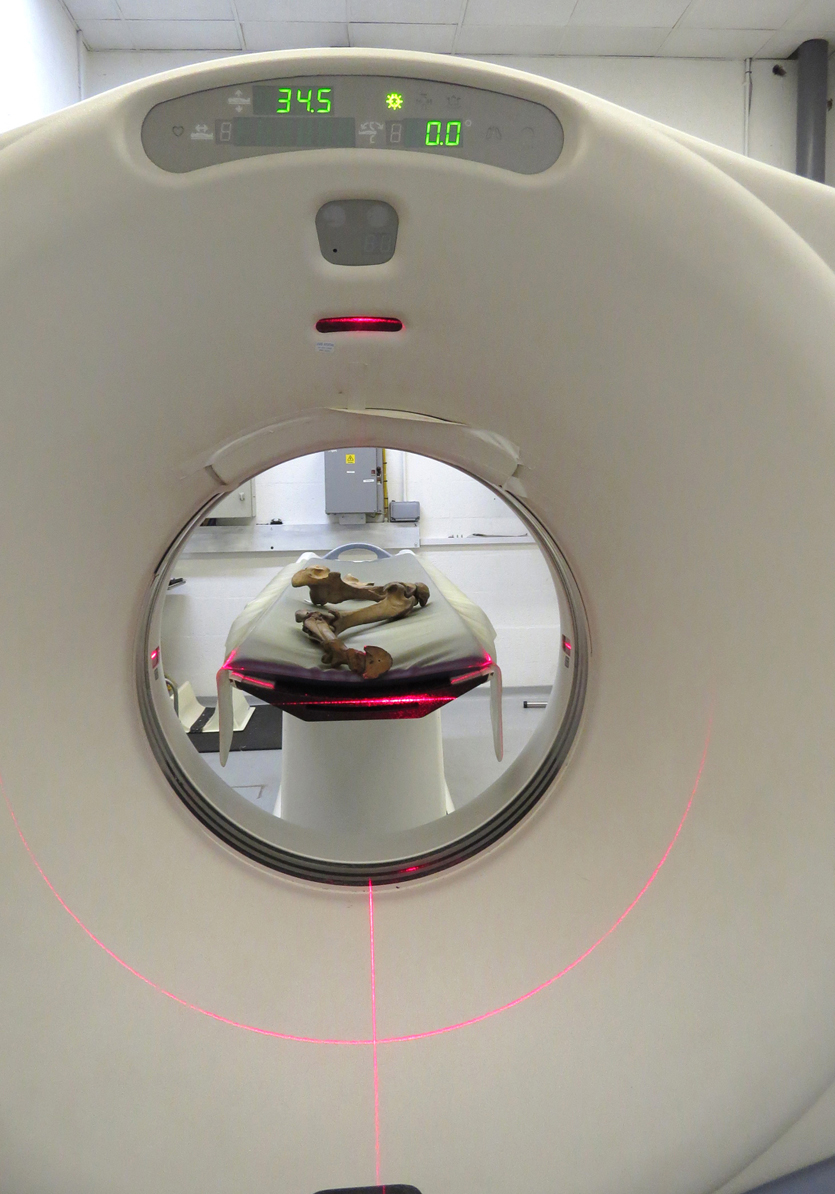
the rear right limb was taken to the Royal Veterinary College in Hertfordshire to get it CT scanned so that the digital data could be ‘mirrored’
and a rear left limb created by 3D printing. Despite the pins and other small pieces of metalwork holding the small foot bones together,
the CT scan was successful and the rear left limb was 3D-printed and attached. The missing right scapula was also 3D printed by mirroring the CT scan data.
All the 3D-printed models were dyed black so that they are easily distinguished from the rest of the skeleton. See the last photo below. This project was written-up and published. See:
Nigel R. Larkin and Laura B. Porro (2016) Three legs good, four legs better: Making a quagga whole again with 3D printing. Collection Forum: Fall 2016, Vol. 30, No. 1-2, pp. 73-84.
https://doi.org/10.14351/0831-4985-30.1.73


For more details about what we can do for you, or for a quote, please
contact:
enquiries@natural-history-conservation.com
We
are members of the Institute of Conservation.