Cleaning, conserving, repairing and remounting a complete ichthyosaur skeleton for Norfolk Museums and Archaeology Service.

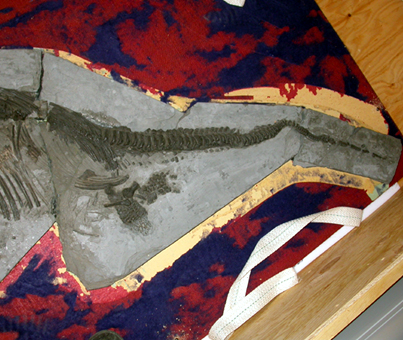
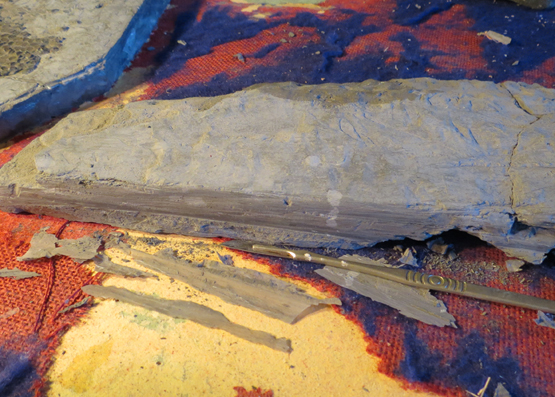
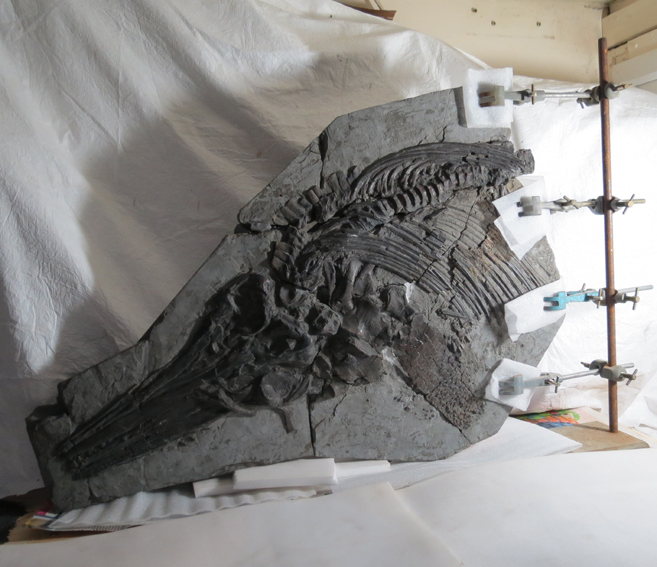
The images above show the state of the specimen before work started; on an unsightly old backing board, broken into several pieces, with some significant gaps and the old resin adhesive peeling off the surfaces.
Cleaning: After the old failing resin adhesive was peeled off the surfaces into which it had not penetrated on the rear of the specimen and in the old breaks (in some places a scalpel was used to get the resin off) the specimen was cleaned with soft brushes and a vacuum cleaner. The whole specimen was then gently cleaned with an airabrasive unit utilising compressed air lightly laced with sodium bicarbonate. This removed the aged varnish and also removed some matrix still obscuring the detail of some of the bones. The specimen was then lightly dusted-off with compressed air.
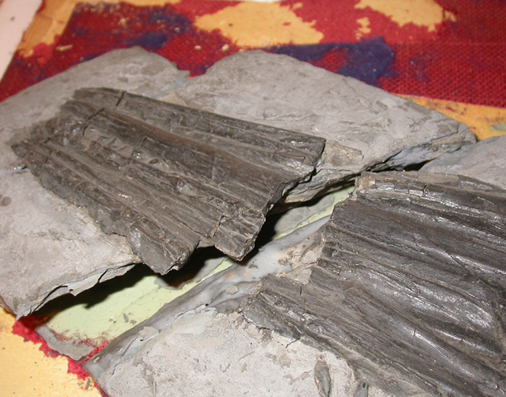
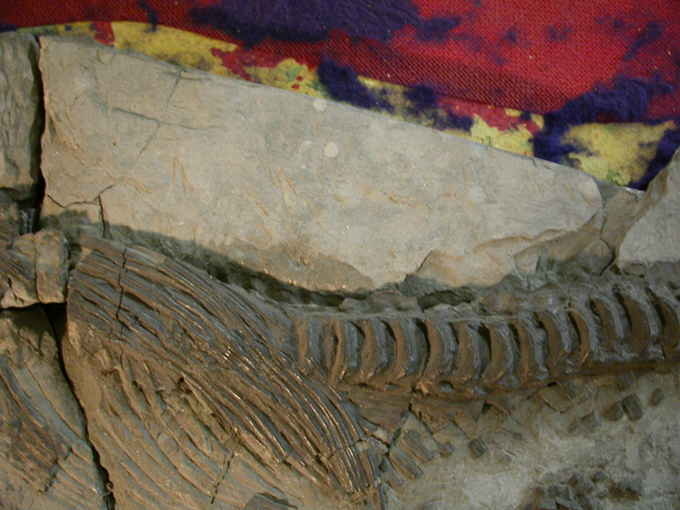
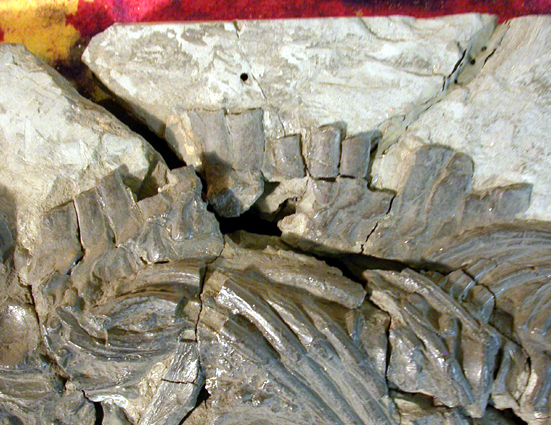
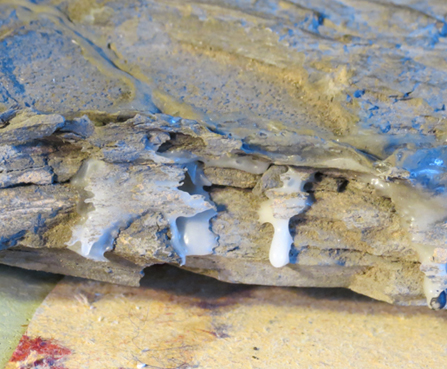
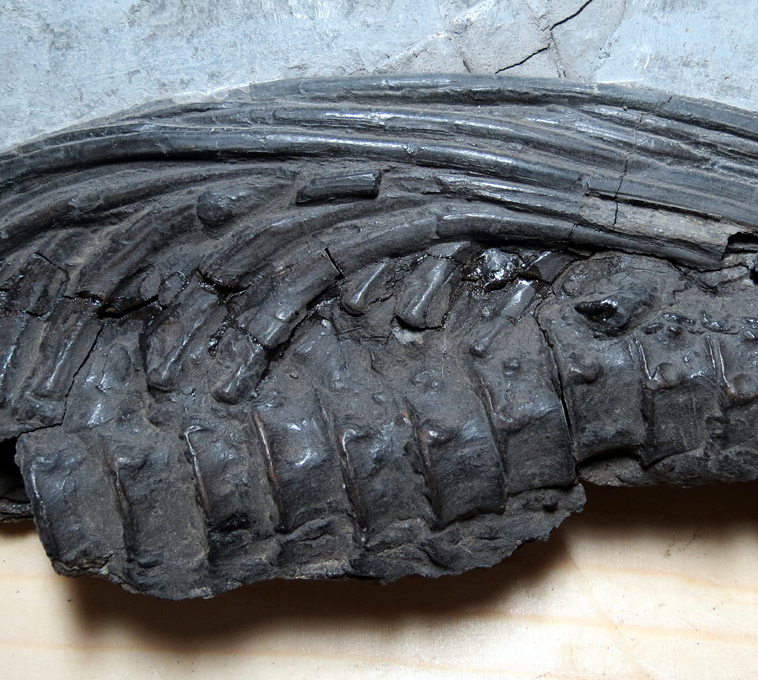
See the photos below for examples of airabrasive cleaning: the upper three photos show elements before cleaning and the lower three photos show the same areas after cleaning.


Repairing: The surfaces of the breaks, once clean, were treated with Paraloid B72 consolidant at 10% in acetone, then the same surfaces had Paraloid B72 adhesive applied and the pieces were set together with gravity helping and held in place with clamps (with foam protecting the specimen from the clamps). Once this had set, small gaps between the various pieces were filled with Paraloid B72 adhesive mixed with glass beads to form a gap-filling paste (see: Larkin, N. R., Makridou, E., 1999. Comparing gap-fillers used in conserving sub-fossil material. The Geological Curator 7 (2), 81-90). Larger gaps were filled with plaster of paris tinted with pigment to match the surrounding matrix.
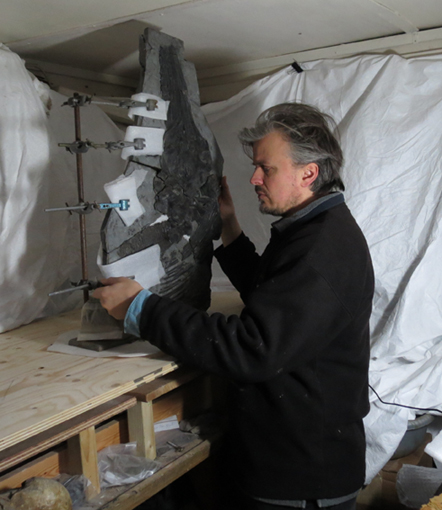

Remounting: A single sheet of 18mm thick plywood was cut to the right size to provide a backing board for the specimen. This had two thick reinforcing batons screwed to the rear lengthwise. The specimen was temporarily placed upon the board in the middle and its outline was drawn on the wood in pencil. The specimen was then removed and dozens of brass screw were inserted within the outline with their heads just showing. Jesmonite acrylic resin (tinted with black pigment) was applied within the outline, over the screw heads, followed by another layer of the same tinted resin combined with glass fibre cloth. Then the rear of each piece of the specimen was first treated with Paraloid B72 consolidant at 10% in acetone, then with Paraloid B72 adhesive at 50% in acetone and left to set. This was applied as a barrier layer to protect the specimen from the resin used to bond it to the wood but it also it provided a secure surface to which the resin could bond. Jesmonite acrylic resin (tinted with black pigment) was then applied to the rear of the specimen with fibre glass cloth and then once again applied to the backing board The specimen was then laid upon the resin on the backing board and was left for the resin to set. Where there was still a gap left between the specimen and the backing board this was filled with the same Jesmonite resin tinted with black pigment, but plenty of volumising hollow phenolic microspheres were added to the resin to reduce the weight. This was sanded down and painted and the gap-fillers were painted, both with artists acrylic paints. These gap fillers were deliberately not painted out perfectly, but so that it would be obvious on close inspection which areas were real and which were filled gaps. The bare wood of the backing board was also painted. No barrier film or barrier varnish was used on the wooden backing board as the specimen was not going to be displayed in a sealed glass cabinet but would be on open display.
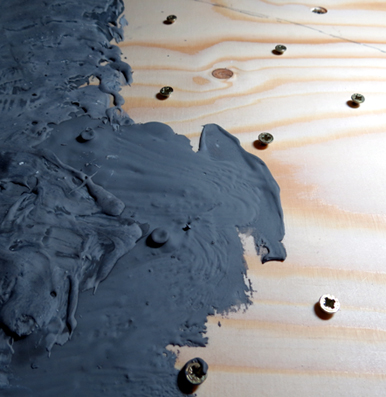


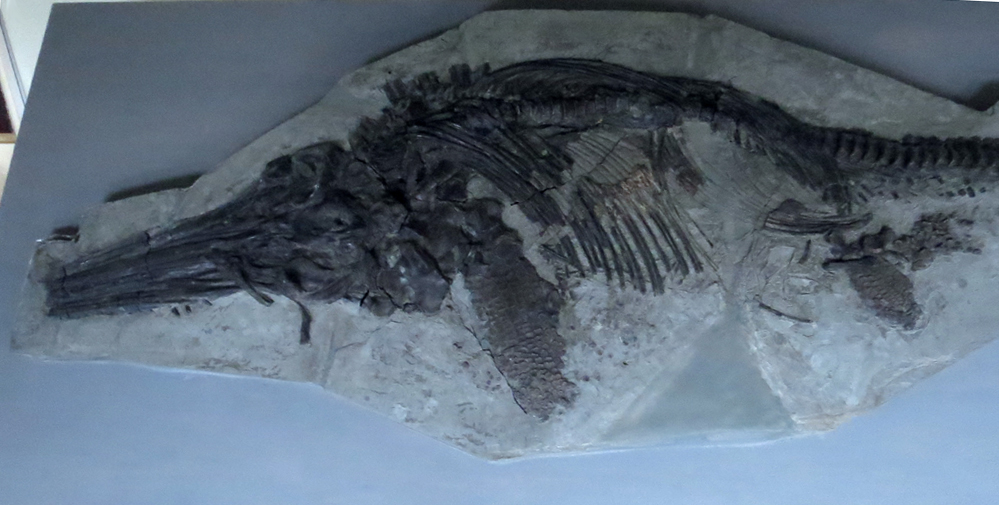
Above: the screws and resin on the backing board; and some gaps filled and tidied before being painted. Below: the finished specimen.
For more details about what we can do for you, or for a quote, please
contact:
enquiries@natural-history-conservation.com
We
are members of the United Kingdom Institute for Conservation of Historic and
Artistic Works