Cleaning, conserving and mounting a camel skeleton for Sheffield Museums, including replicating missing bones. Nigel Larkin, July 2018.
Condition of the specimen and plan for remounting
The bones of this skeleton were incredibly dirty – almost black in places - from being in storage for many years historically in poor storage conditions. In places there were patches of white ‘fur’, possibly salt efflorescence or mould. Some bones had blue marks on them from where they had presumably lay on shelves painted blue. Therefore all the bones required quite intensive cleaning. Many of the ribs were separated from their vertebrae and the other ribs were no longer in the right orientations, with the ribcage collapsed. These ribs would have to be matched-up and the ribcage rebuilt. Many ribs had fragments of old rusty wire still embedded in them from when they were articulated in the past and these would have to be removed. The sternum was not complete and was in poor, fragile condition and would require repair. One toe was badly broken with some pieces missing, requiring repair. One scapula was missing, as was the atlas vertebra and these would need to be replaced appropriately with replicas. The head of the left femur was also missing.
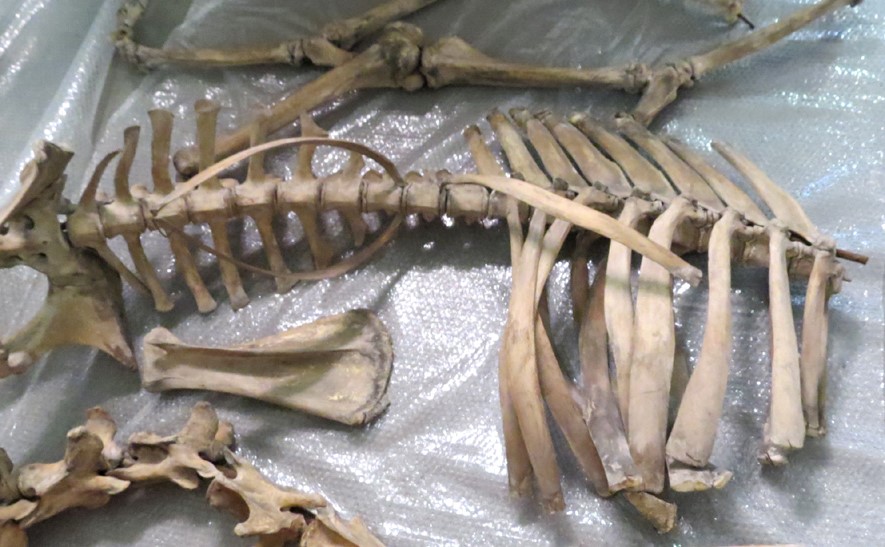
Above: The vertebral column and collapsed ribcage – some ribs are not attached.
None of the original supporting armature of the mount survived, except the bar on which the vertebrae were threaded and this was rusty and incomplete and would have to be replaced. However, the bones of each of the four limbs were still articulated together (although some smaller bones were loose and needed to be reattached). The limbs were originally articulated in a manner that had the skeleton in a ‘walking’ pose, rather than a static four-square pose, and this dictated that the re-articulated skeleton would also be in a walking pose. New upright supports were required, and a wooden plinth.
Where possible the skeleton would be mounted the same way as before so that old holes drilled in to the bones could be reused, rather than drilling new holes in the specimen. All conservation and cleaning techniques and materials would be as minimally invasive as possible. All glues and consolidants used would be stable and reversible and all processes and materials used on the specimen would be recorded.
Cleaning
The whole skeleton required intensive cleaning as it was covered with dust, dirt and grime. In places the bones were almost black, and some had a salt efflorescence-like growth on their surfaces. The bones were cleaned first with soft brushes next to the hose of a vacuum cleaner to remove the debris and dust. Then they were cleaned with a gentle museum conservation detergent, an alcohol ethoxylate (Synperonic A7) in distilled water. It was applied to small areas at a time with a soft brush, then wiped away immediately with a lint-free paper towel. Then the area was cleaned again with clean water (with no detergent) and immediately dried again with a paper towel. The most stubbornly dirty areas, particularly those patches of blackened bone, were cleaned again in a similar fashion but with stiffer brushes. Such cleaning often had to be undertaken multiple times before the dirt was fully removed.

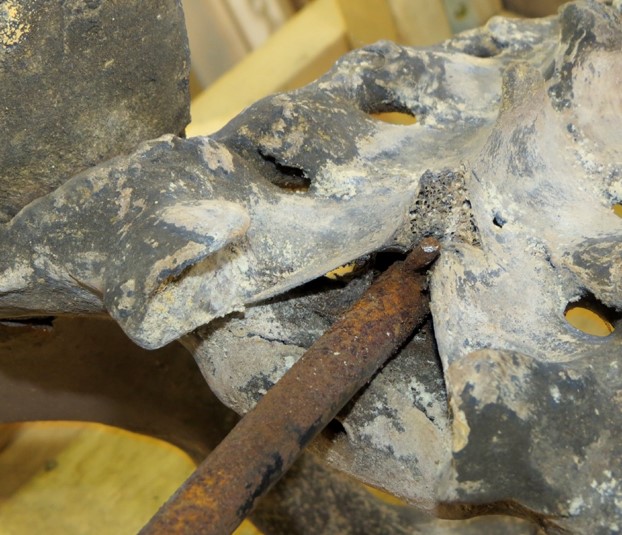
Above: some of the dirty bones before cleaning, and rusty metalwork.
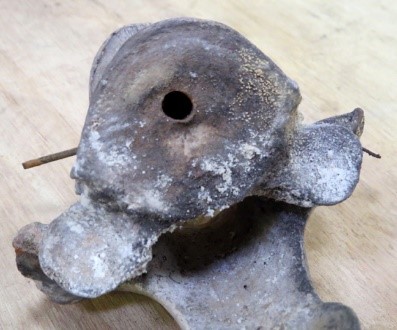
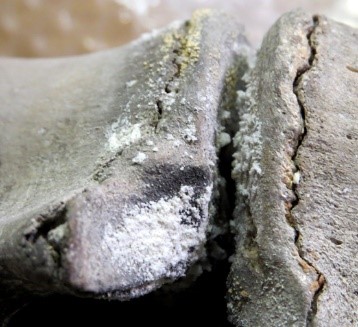
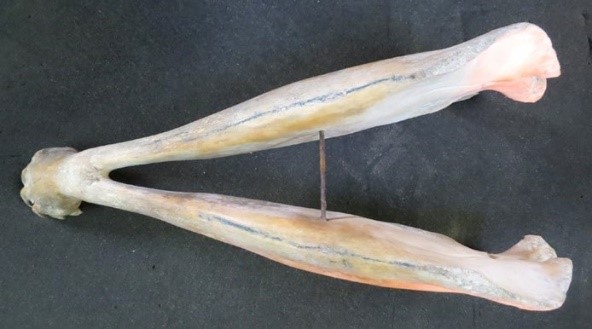
Above: examples of mould or efflorescence on bone (left and middle); and blue paint on the underside of the mandible (right).
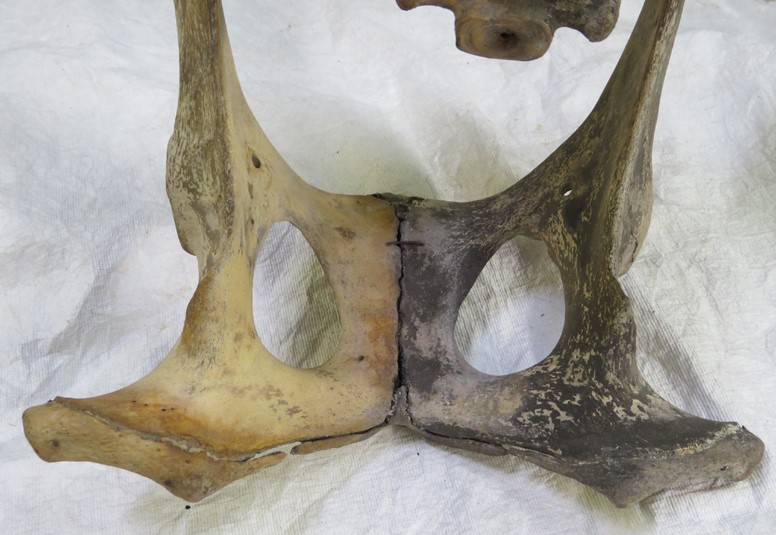
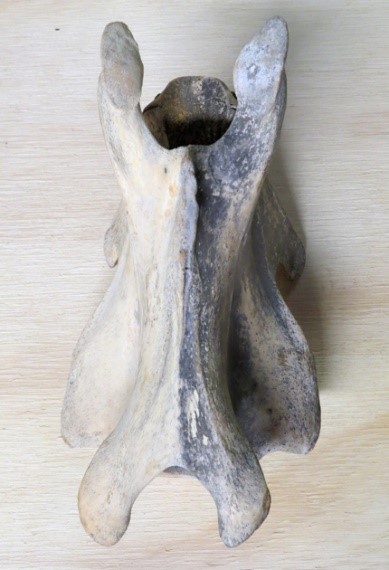
Above left: the pelvis halfway through cleaning. Above right: a cervical vertebra half way through cleaning.
Repairs
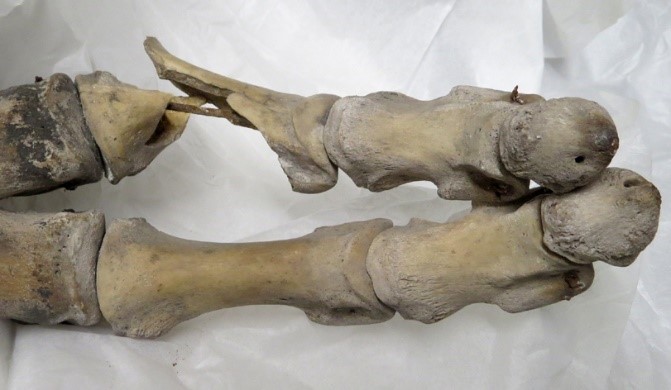
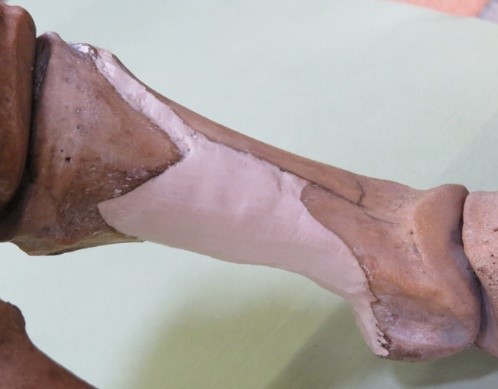
The sternum was not complete and was in poor, fragile condition. After cleaning the pieces were consolidated with Paraloid B72 at 5% in acetone. Pieces were re-adhered with Paraloid B72 adhesive. Some smaller pieces were so badly broken they could not be reattached as they could not be matched-up. One toe bone was badly broken with some pieces missing, requiring repair. The broken areas were consolidated with Paraloid B72 at 5% in acetone and pieces were re-adhered with Paraloid B72 adhesive. The missing areas were modelled-in using plaster of Paris, and the plaster was coloured with artists’ acrylic paints.
Replication of the missing bones
The right scapula was missing. Therefore the morphology of the left scapula was recorded with photogrammetry,
a virtual digital model built and ‘mirrored’ to create a digital model of the missing right scapula and this was 3D printed in gypsum.
This work was undertaken by Steven Dey of ThinkSee3D . This model was then coloured with artists’ acrylic paints to match the right scapula. The missing atlas vertebra was replicated using more traditional techniques. Nigel Larkin was loaned the atlas vertebra from a camel skeleton at the Cole Museum of Natural History at Reading University. This was cleaned, a two-part silicone rubber mould taken, and a cast made from this mould in Jesmonite acrylic resin with fibre glass. Then this replica was coloured with artists’ acrylic paints to match the adjacent bones.
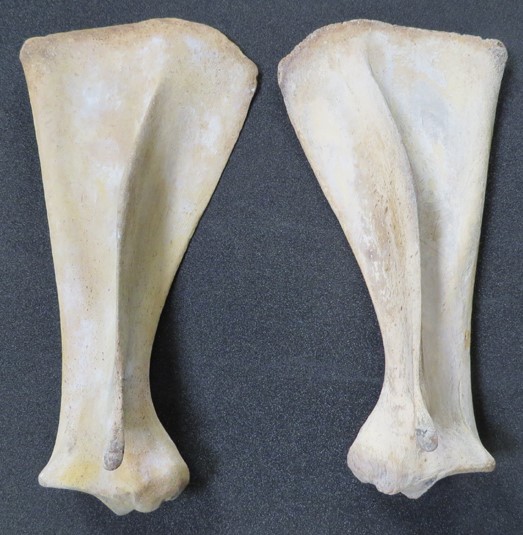
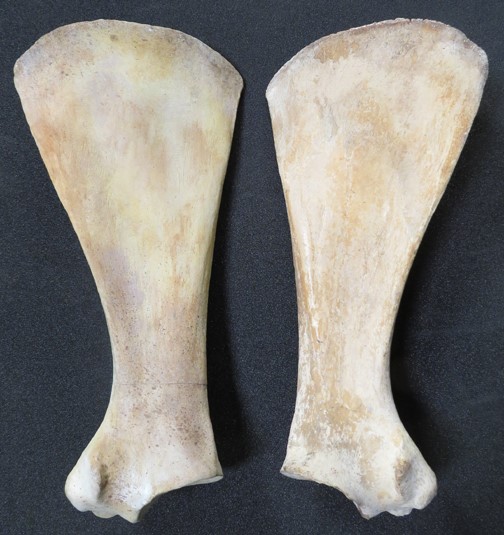
Above: the real scapula and the painted 3d printed replica.
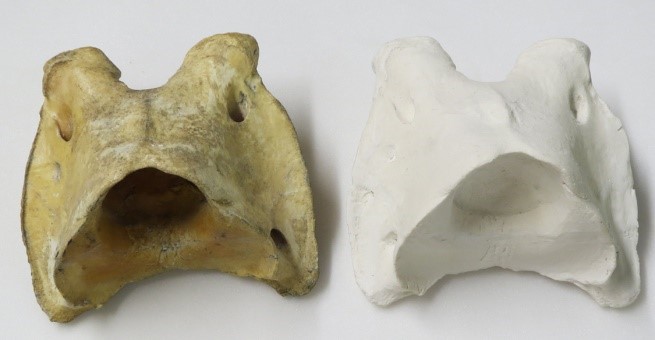
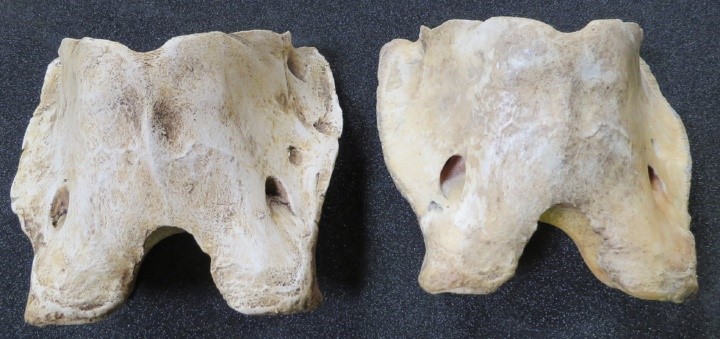
Above: the real atlas vertebra and the cast (on the right, the cast has been painted)
Mounting
All the supporting metalwork and brackets had to be designed and made in a way that meant the specimen could be fully mounted in the conservation workshop and then disassembled and transported to the museum and assembled again relatively easily whilst also providing as secure a support to the whole skeleton as possible.
All the ribs were numbered with pencil before being removed from vertebrae to be cleaned. The rusty pieces of wire were removed from the ribs. The vertebrae were numbered with pencil before being removed from the rusty vertebral bar that ran through the neural canal (vertebral foramen) of the vertebrae. This bar had been sawn off short in the past for some reason and needed to be replaced with a longer metal bar, shaped to take the vertebrae in the correct anatomical position. A second, thinner, rod that ran through holes drilled through the centra of the lumbar and thoracic vertebrae (to keep them in line) was also removed, but kept for re-use.
By looking at diagrams of various camel skeletons online and by looking at photographs of other mounted camel skeletons and plotting them on a large sheet of graph paper, the correct shape of the new vertebral bar was established. This was then made through heating and bending a steel rod to the right shape. A steel rod was welded to the bar to project ventrally so that it would insert into the top of an upright tube, with the tube taking the weight of the front of the vertebral column and ribs plus the skull and mandible. At the rear, the pelvis clearly had simply sat on the top of an upright tube, with a thin metal rod running vertically through a hole in the vertebral pole, through the pelvis above and below the vertebral pole, and into the upright hollow tube below. A small Plastazote foam-lined bracket was made to the shape of the underside of the pelvis to more comfortably take the weight of the rear of the skeleton so that the underside of the pelvis was under less stress and was less likely to suffer damage.
The two upright supports were made from hollow steel tubes cut to the right length and a floor plate welded to the lower end in each case. As the long neck and heavy skull exert quite a bit of force on the front upright, extra supports were needed either side and to the front. To keep the upright tube exactly vertical.
The two humeri of the front legs already had a hole drilled into their ventral surface. This indicated that they were supported by metal rods that were part of the front upright support which is a traditional way of mounting medium and large mammals. Therefore steel rods were bent to shape and welded to the upper portion of the front support as required.
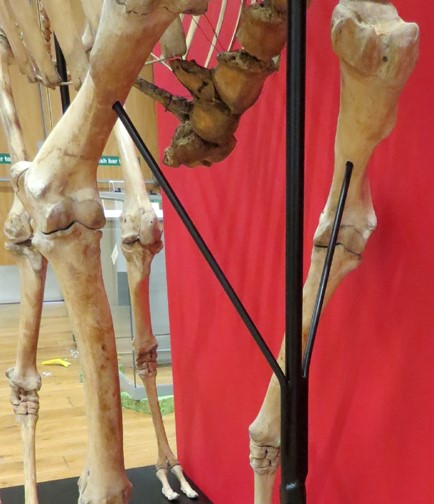
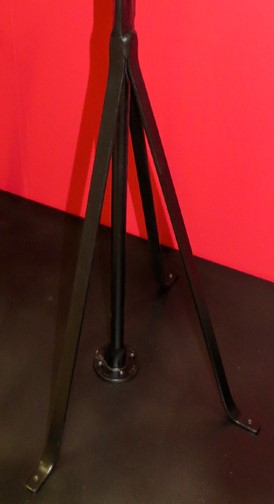
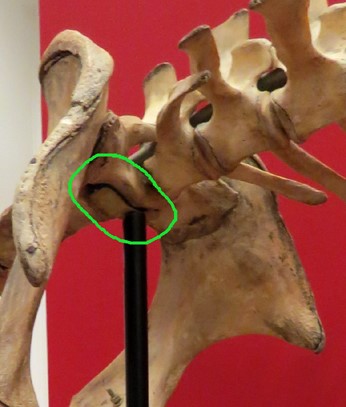
Above: Left, the metal supports for the humeri; middle, the braces for the front upright; right, the small bracket made for the underside of the pelvis.
The positioning of the feet was dictated by the shape of the already-articulated limbs, meaning that the skeleton is ‘walking’ rather than standing still. The feet are secured in position with small nails that run through small holes drilled through two bones in each foot. This is a traditional method of securing the feet so that the limbs stay in the correct orientation.
All the metalwork was painted to prevent it from rusting. The vertebral rod was painted to match the bone of the skeleton and all other metalwork was painted black to match the plinth which was painted black.
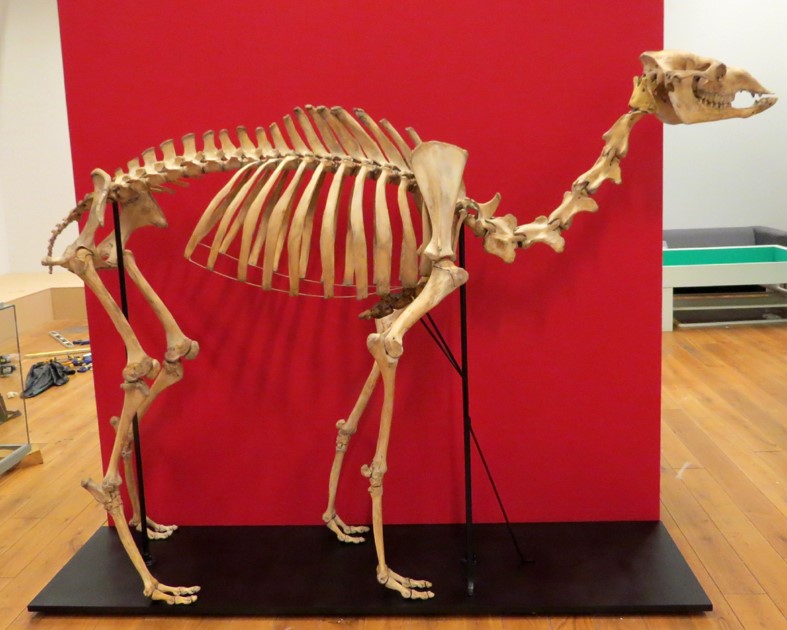
Above: The finished skeleton in place during the installation of the gallery in Sheffield
For more details about what we can do for you, or for a quote, please
contact:
enquiries@natural-history-conservation.com
We
are members of the Institute of Conservation.