Cleaning, repairing, conserving and making a permanent plinth for a large tortoise for University College London’s Grant Museum of Zoology.
This specimen was cleaned and conserved as part of University College London Grant Museum of Zoology’s
Bone Idols Project (funded by NatSCA, Arts Council
England's Museum Development Fund and various members of the public).
Condition of the specimen:
The whole specimen, inside and out, was very dirty and needed to be cleaned. Also, there was a lot of extraneous stuffing inside the specimen which needed to be reduced to keep the specimen cleaner and less prone to insect infestation and there appeared to be traces of an old mould infestation (small white dots) in several places on the skin which had to be cleaned and removed. Several pieces of the surface of the carapace were missing. There was a large crack right through the carapace on the front right, along a suture, adjacent to where an edge of the carapace has become detached. This crack needed to be closed and the edges adhered together and the detached piece replaced. Several other pieces of the carapace were loose and needed to be secured. The claws on the front feet had been painted with red nail varnish in the past and this need to be removed. There were some pieces missing from the plastron, also some pieces were loose. There were a couple of patches of old adhesive on the surface of the bone which was unsightly and some paint and both the paint and glue needed to be removed if possible, and the whole plastron cleaned as well as adhering the loose piece of the plastron in place. The specimen was suffering damage because its fragile legs took the weight of the whole body. It was also suffering each time it was picked up and handled: the legs are weak, the carapace is fragile and the plastron and carapace are loosely wired together and are a poor fit. The specimen would suffer much less stress and damage if it was stored on (and always moved on) a permanent base board, with Plastazote foam of the right thickness placed under its body to take most of the weight, rather than its legs.

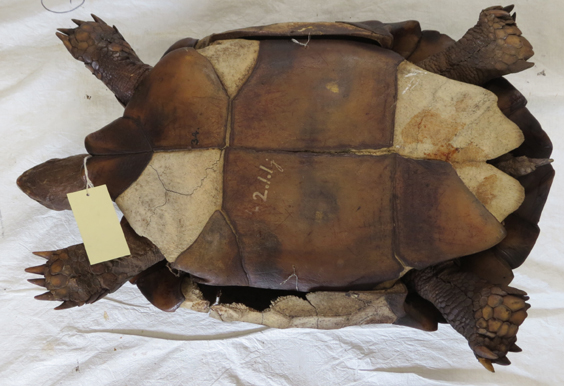


Above: Far left, the tortoise before conservation from above; Left, the underside of the tortoise before conservation;
Right, old excess glue and chalk on the bone of the carapace; Far right, red nail varnish on the claws.
Cleaning:
The whole specimen was carefully ‘dry cleaned’ first, using a variety of very soft artists’
brushes and a vacuum cleaner with gauze over the nozzle to remove dust and loose dirt. Then
the specimen was ‘wet cleaned’ with Synperonic A7 conservation detergent diluted in water,
applied by swabbing with small cotton buds, cleaning small areas at a time and patting the
area dry with paper towels, followed by ‘rinsing’ with clean with very small amounts of water
also applied with small cotton buds and patted dry again quickly. This was repeated until all
dirt and water was removed. The red nail varnish was carefully dissolved with very small
amounts of nail varnish remover on cotton swabs. Once thoroughly dry, the plastron and
carapace ‘shell’ areas were further cleaned and polished with Rennaisance Wax which really
helps to clean the shell and allow the colour to shine through.


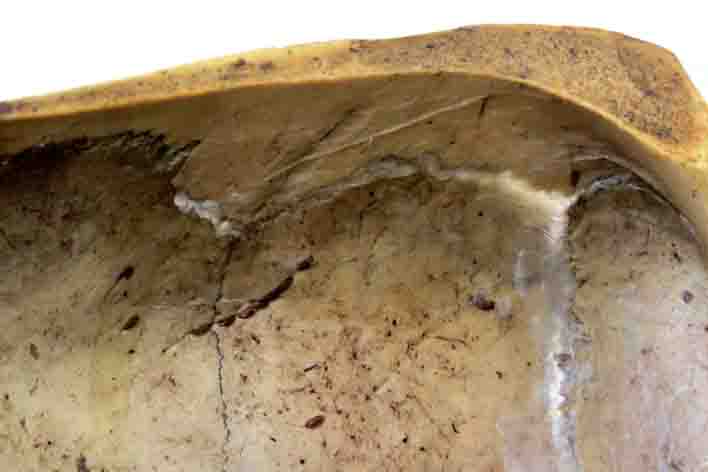
Above: Far left, excess wire protruding from the forehead of the tortoise; Left, the forehead of the tortoise after the wire was removed;
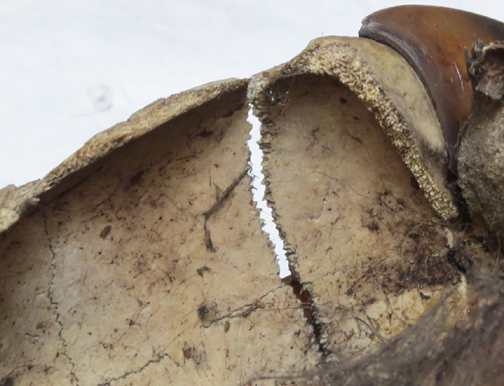
Right, the detached piece of carapace bone held roughly in position, with the crack in the carapace just below the thumb; Far right, the crack in the carapace looking from inside the carapace (the internal surface).
Repairs:
The wire sticking out of the forehead was cut much shorter and is no longer visible. The excess stuffing inside the carapace, issuing from the hollow legs and neck, was trimmed back a bit and was stored in a small ziplock poly bag. The areas of possible ‘mould’ infestation were swabbed lightly with ethanol on cotton buds before they were cleaned with the methods described above. The loose pieces of ‘shell’ on the plastron and carapace were adhered to the bone surface with Paraloid B72 adhesive after a light application of consolidant (Paraloid B72 in acetone) between the two surfaces. To repair the large crack in the carapace and re-adhere the loose piece of bone that had become detached, Japanese tissue paper was applied within and across the join using neutral pH adhesive. By applying more of this this across the inside of the join once it had set, it makes a much stronger repair.

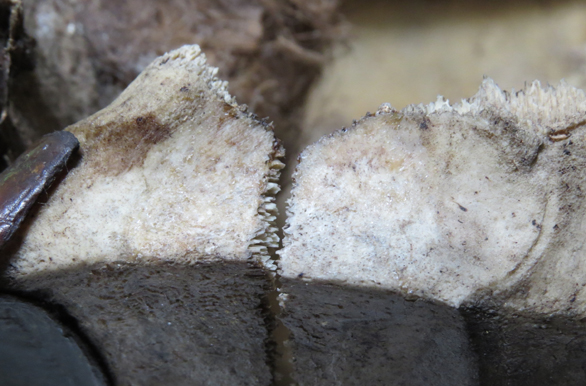
Above: Far left, old glue either side of the crack; Left, the same area after the old glue was removed;
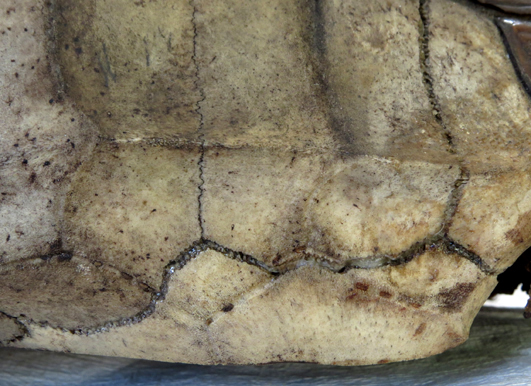
Right, the repaired area of carapace bone where the crack has been held together and the detached piece of bone re-joined, looking at the external surface of the carapace; Far right, the same area of repaired bone but looking at the internal surface where the Japanese tissue and adhesive is transparent and amost invisible.>br>
Plinth:
To reduce overhandling of the fragile specimen, a permanent plinth was made from 30mm thick MDF. This had two coats of Dacrylate applied to reduce the emission of Volatile Organic Compounds and was painted with black satin paint to match all the other plinths in the museum. Thin batons of wood were glued to the underside with PVA adhesive to lift the plinth up of a tabletop etc by 10mm, allowing fingers to get underneath so that the plinth is more easily picked up and moved without risk to the specimen. A piece of Plastazote foam
10mm thick was cut to the right shape and size to fit underneath the plastron so that the legs of the specimen were lifted off the surface of the wood and the weight is taken entirely by the plastron instead, reducing the stress on the legs.

The finished specimen on its new plinth.
For more details about what we can do for you, or for a quote, please
contact:
enquiries@natural-history-conservation.com
We
are members of the Institute of Conservation.